Edit Private Clarification
The Edit Answer page allows ICMs and PDs to answer a private clarification.
You arrive at this page by clicking on the  icon in the Answer Clarification pane (click here for more detail).
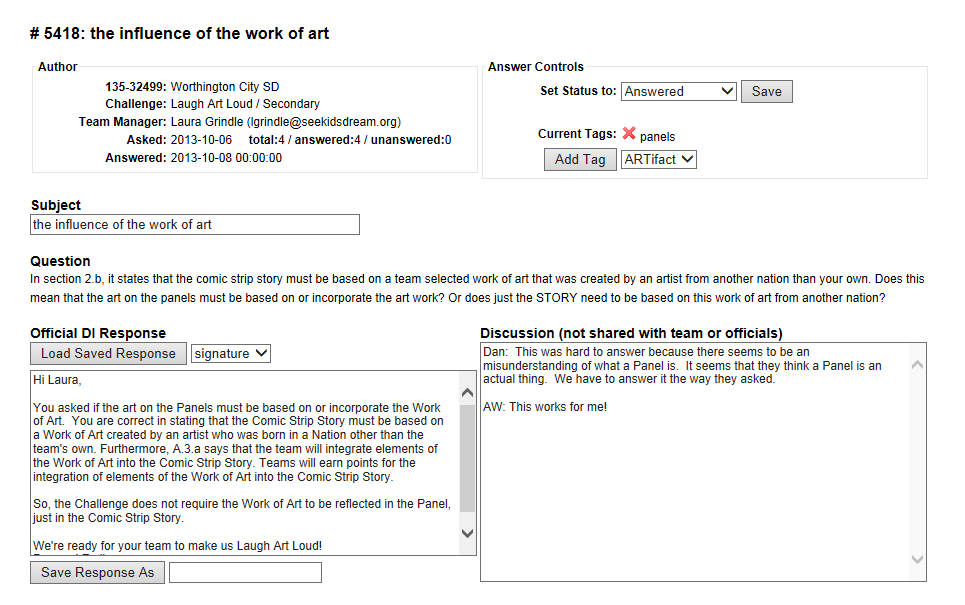
There are a lot of controls on this page as answering a clarification is a complex task. Using the screen shot below, we will make our way through the page.
In the upper left is the Author information:
- team number and team organization
The team number cannot be changed as it is assigned by the Shop when the team number is purchased. The team organization is an editable field, so this might change through time. - the 3rd line is the actual person filing the clarification
On the left is their role that could be Team Manager, Team Member or Team Coordinator. To the right is their name an email address. - the 4th line indicates when the question was asked
You will also see counts of the other clarifications asked by the team. - the last line indicates when the question was answered
In the upper right are important controls for saving the changes you make.
- click the Save button to save your changes
- the dropdown to the left of the Save button sets the status of the clarification
For more on clarification statuses, click here. Note that when you transition a clarification to answered, the answer will be emailed to the team. - Current Tags lists the tags associated with this clarification (click here for more on tags)
The icon to the left on a tag can be used to disassociate this tag with the clarification.
 - Clicking Add Tag button will associate the tag you select in the dropdown to the right with this clarification
In the center of the page you will find:
- The Subject of the clarification
Note that you can edit the subject of the clarification. The subject appears in listing and as a title for a clarification page. If you don't find the title particularly useful, change it to more accurately reflect the subject of the clarification. - The Question asked
In the lower left, you will find the controls for creating the clarification answer.
- the main text area is where you type your answer to the clarification
This text will not be saved until you click the Save button. - the Load Saved Response controls (click here for more on Saved Responses)
These controls are only present once you have save a response. To load a saved response, select the response in the dropdown to the right and click the Load Saved Response button. This will append the saved response to the end of the current answer text. The new next is NOT saved as part of the clarification answer until you click the Save button. - the Save Response controls (click here for more on Saved Responses)
These controls will save the current answer text as a Saved Response. The name of the saved response should be typed in the the text box to the right of the Save Response As button. Once you click the Save Response As button, your response is saved and the name should now appear it the dropdown to the right of the Load Saved Response button so it can be appended to an answer at a later time (probably when you are answering a similar clarification later).
In the lower right, you will find the Discussion area:
- This area is designed to promote a discussion of the clarification. You can note issues or agreement with prior discussion. You can raise a point with the PDs or the PDs can raise a point with the ICMs. It is frequently through these comments that the answer is forged.
- By convention, an individual prepends his/her comments with their initials so people know who is speaking.
- These comments are not shared with others. Teams, ADs, ACMs, and RCMs do not see the comments; only the ICMs for your challenge and the PDs.